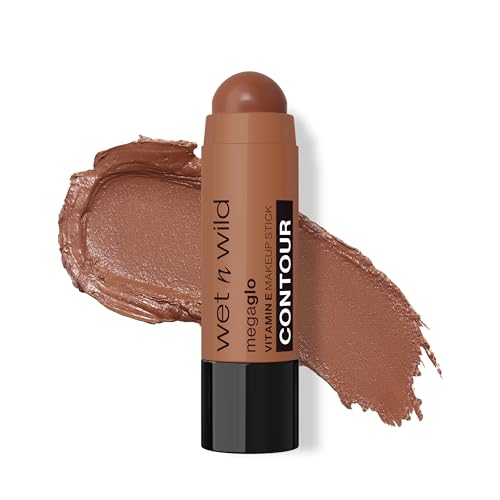
Contour Makeup: The Complete Guide to Sculpting & Defining Your Face
Learn professional contouring techniques for every face shape, discover how to choose the right shades, and master the art of subtle, natural-looking definition.
START LEARNINGWhy Contour Works: Contour makeup uses light and shadow to create the illusion of dimension. By strategically placing deeper shades where shadows naturally fall and lighter shades where light hits, you can sculpt cheekbones, define the jawline, narrow the nose, and lift the appearance of your entire face — no matter your face shape or skin tone.
What Is Contour Makeup?
Contour makeup is a technique that uses darker, cool-toned products to create shadows on the face, mimicking the natural play of light and shadow that defines bone structure. Unlike bronzer, which warms the complexion, contour is designed to recede areas and create the illusion of depth. When paired with a complementary highlighter, contour can make cheekbones appear higher, jawlines sharper, and noses more refined.
The technique has roots in theatrical makeup, but modern contouring has evolved into an everyday beauty staple. Today's formulas — from cream sticks to finely milled powders — are designed to blend seamlessly into the skin for a natural, sculpted finish. Whether you prefer a subtle wash of definition or a full glam transformation, contouring is one of the most versatile tools in makeup artistry.
If you are new to face makeup, it helps to understand the broader canvas first. Our guide to makeup looks covers foundational techniques, while a dedicated foundation guide explains how to build a smooth base that contour can sit on top of. For those who prefer a cream-based approach, a cream blush can be layered with cream contour for a cohesive, skin-like finish.
Contour vs. Bronzer vs. Highlighter
These three products are often confused, but they serve distinct purposes. Understanding the difference is essential for a balanced, professional-looking result.
| Product | Purpose | Undertone | Placement |
|---|---|---|---|
| Contour | Creates shadows, sculpts bone structure | Cool or neutral | Hollows of cheeks, temples, jawline, sides of nose |
| Bronzer | Adds warmth and a sun-kissed glow | Warm (golden, peachy) | High points of face: forehead, cheekbones, bridge of nose |
| Highlighter | Reflects light, brings features forward | Shimmer or satin, light reflective | Top of cheekbones, brow bone, cupid's bow, nose tip |
A common mistake is using a warm bronzer as a contour — this can make the face look muddy or orange rather than sculpted. Cool-toned contour shades mimic natural shadows, while warm bronzers mimic sunshine. For a complete complexion routine, many makeup artists layer all three: contour for structure, bronzer for warmth, and highlighter for luminosity.
Choosing the Right Shade & Formula
The right contour shade depends on your skin tone and undertone. As a rule of thumb, choose a contour that is two to three shades deeper than your foundation with a cool or neutral undertone. Avoid shades with strong red or orange bases, as these will look like blush or bronzer rather than shadow.
- Fair skin: Taupe, soft grey-brown, or cool ash shades work best. Avoid anything too dark or warm.
- Light to medium skin: Cool medium browns and soft cocoa tones blend naturally.
- Medium to tan skin: Neutral-to-cool browns and deep taupe shades create believable shadows.
- Deep skin: Rich espresso, cool dark chocolate, and deep ebony shades provide the necessary contrast.
When it comes to formula, cream contour blends most naturally into the skin and is ideal for dry or mature skin. Powder contour offers sharper definition and longer wear, making it a favorite for oily skin and special occasions. Many makeup artists use both — cream first, then a light veil of powder to set and intensify. A quality face primer underneath helps both formulas adhere and last throughout the day.
Contour Placement by Face Shape
Every face shape benefits from a slightly different contour placement. The goal is always to enhance your natural bone structure and create balance — not to change your face into something it is not.
| Face Shape | Goal | Contour Placement |
|---|---|---|
| Round | Create angles and elongate | Temples, under cheekbones (blend upward toward ears), along jawline |
| Square | Soften corners and add length | Corners of forehead, under cheekbones, along jaw corners |
| Oval | Enhance natural balance | Light contour under cheekbones, subtle temples, optional jawline |
| Heart | Balance a wider forehead and narrow chin | Temples, under cheekbones, sides of chin |
| Long / Oblong | Shorten and widen the appearance | Forehead hairline, under cheekbones (horizontal), chin |
| Diamond | Soften cheekbones and widen forehead/chin | Under cheekbones, temples, jawline |
Understanding your eyebrow shape and overall facial proportions also helps guide contour placement, since brows frame the face and influence how sculpted features appear. If you are contouring for a special event, pairing your look with smokey eyes creates a dramatic, balanced effect.
Step-by-Step Contour Technique
Follow this professional sequence for a seamless, natural-looking contour that lasts all day.
-
Start with a clean, primed base.
Apply your foundation and concealer as usual. For best results, use a foundation brush or damp sponge to create an even canvas. Let your base settle for a minute before contouring.
-
Map your contour placement.
With a light hand, draw or pat contour along the hollows of your cheeks, temples, jawline, and the sides of your nose. Use a mirror in natural light to check that the placement follows your natural shadows.
-
Blend upward and outward.
Using a dense brush or damp beauty sponge, blend the contour in upward, sweeping motions toward your ears. This lifts the face and avoids harsh lines. For powder contour, use a fluffy blush brush or a dedicated contour brush with light, circular motions.
-
Add highlighter to the high points.
Apply a light, luminous highlighter to the tops of your cheekbones, brow bone, cupid's bow, and the bridge of your nose. Blend gently so the transition between shadow and light looks seamless.
-
Set and refine.
Lightly dust a translucent setting powder over the contour to lock it in place. If you used cream contour, a light layer of setting powder prevents transfer and extends wear. Finish with a setting spray for an all-day hold.
Common Contour Mistakes to Avoid
- Using a warm bronzer as contour: This creates an orange stripe instead of a shadow. Always choose a cool-toned contour product.
- Applying too much product: Start light and build gradually. It is much easier to add product than to remove it.
- Skipping the blend: Unblended contour looks harsh and unnatural. Take your time with a clean brush or sponge.
- Placing contour too low: Contour should sit in the hollow of the cheek, not below it. Suck in your cheeks to find the natural hollow.
- Ignoring your face shape: A one-size-fits-all approach rarely works. Adjust placement to flatter your unique bone structure.
- Contouring dry, flaky skin: Exfoliate and moisturize before makeup. A face mask the night before can improve texture and make blending easier.
If you are contouring for a photoshoot or evening event, a full-coverage foundation provides a smooth, even base that helps contour products blend more seamlessly. For a more natural daytime look, a tinted moisturizer paired with a cream contour creates a fresh, skin-like finish.
Essential Contour Products
Building a contour kit does not require a huge collection. Focus on quality tools and formulas that suit your skin type and preferred finish.
| Product Type | Best For | Quality Tier |
|---|---|---|
| Cream contour stick | Beginners, dry skin, natural finish | Entry-Level |
| Powder contour palette | Oily skin, long wear, sharp definition | Mid-Range |
| Contour & highlight duo | Travel, quick routines, versatility | Mid-Range |
| Liquid contour | Mature skin, seamless blending, editorial looks | Premium |
| Professional contour brush | Precise placement, effortless blending | Premium |
| Luxury cream contour set | Special occasions, makeup artists, rich pigment | Luxury |
Beyond the contour product itself, a few supporting tools make a significant difference. A makeup mirror with adjustable lighting helps you see shadow placement accurately, while a brush set ensures you have the right tools for both cream and powder formulas. A beauty blender is excellent for pressing cream contour into the skin without disturbing the foundation underneath.
If you are building a full makeup kit from scratch, start with essentials like under-eye concealer, a reliable mascara, and a versatile lipstick. Contour is the finishing touch that ties a polished look together.
Explore More Makeup Guides
Frequently Asked Questions About Contour
What is the difference between contour and bronzer?
Contour uses cool-toned shades to create shadows and sculpt the face, while bronzer uses warm-toned shades to add warmth and a sun-kissed glow. Contour defines bone structure; bronzer adds color. For best results, use both — contour first, then bronzer on the high points of the face.
How do I choose the right contour shade for my skin tone?
Choose a contour shade two to three shades darker than your foundation with a cool or neutral undertone. Fair skin suits taupe shades, medium skin suits cool browns, and deep skin suits rich cocoa or espresso tones. Avoid shades with strong red or orange undertones, as these will look like bronzer or blush rather than shadow.
Can I contour with cream and powder products together?
Yes. Cream contour is best applied before setting powder for a natural, skin-like finish, while powder contour goes on top of foundation and setting powder for sharper definition. Many makeup artists use both: cream first for a seamless base, then a light veil of powder to set and intensify the contour.
What is the best way to contour a round face?
For a round face, apply contour along the temples, under the cheekbones, and along the jawline to create angles. Blend upward and outward toward the ears to lift and elongate the face. Avoid contouring the apples of the cheeks, as this can make the face appear wider.
How do I prevent my contour from looking muddy?
Muddy contour usually comes from using too much product, choosing a shade that is too warm, or failing to blend thoroughly. Start with a light hand, use a cool-toned contour shade, and blend with a clean, dense brush or damp sponge in upward sweeping motions. Set with a translucent powder to lock everything in place.
Is contouring suitable for mature skin?
Yes, but the approach should be adjusted. Cream and liquid contour formulas are more flattering on mature skin because they blend seamlessly and do not settle into fine lines. Use a light hand and focus on lifting the cheekbones rather than creating harsh shadows. A hydrating face cream and a smoothing primer create a smooth canvas for contour.