Curling Wand Guide: How to Choose & Use for Gorgeous Curls
Everything you need to know about curling wands — from barrel sizes and materials to techniques and safety tips. Achieve salon-quality curls at home.
Explore Top Curling WandsA curling wand is one of the most versatile hair styling tools you can own. Unlike traditional curling irons with a clamp, a wand allows you to wrap your hair around the barrel freely, creating natural, flowing curls with less creasing. Whether you want beach waves, tight ringlets, or loose glamorous curls, the right curling wand can make all the difference.
What Is a Curling Wand?
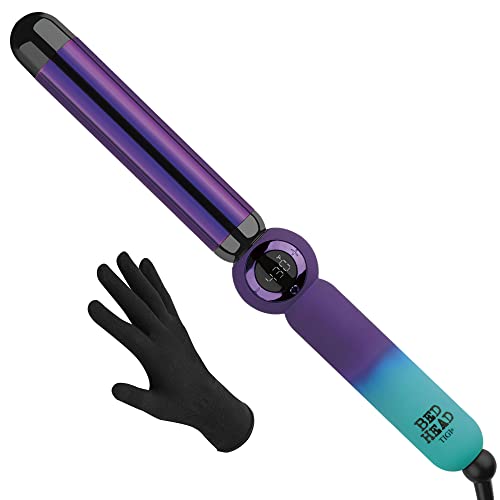
A curling wand is a heated styling tool without a clamp. It consists of a cylindrical barrel that heats up, and you wrap sections of hair around it to create curls. The lack of a clamp means no crease marks, giving you smoother, more natural-looking curls.
Curling Wand vs. Curling Iron: What's the Difference?
Many people use the terms interchangeably, but there are key differences. A curling iron has a clamp that holds the hair against the barrel, which can create creases. A curling wand is clipless, offering more versatility and a more natural finish. Here's a quick comparison:
| Feature | Curling Wand | Curling Iron |
|---|---|---|
| Clamp | No (clipless) | Yes |
| Curl Style | Natural, beachy, loose waves | More defined, uniform curls |
| Learning Curve | Moderate (requires technique) | Easier for beginners |
| Crease Marks | None | Possible |
| Versatility | High (multiple curl types) | Good (but limited by clamp) |
How to Choose the Best Curling Wand
Choosing the right curling wand depends on your hair type, desired curl size, and styling needs. Here are the most important factors to consider:
1. Barrel Size
- 0.5–1 inch: Tight curls, ringlets, and spiral curls. Great for short hair.
- 1–1.5 inches: Loose curls, classic waves. Most versatile size.
- 1.5–2 inches: Large, beachy waves and soft bends. Ideal for long hair.
Shorter hair typically needs a smaller barrel, while long hair benefits from larger barrels for volume and wave.
2. Barrel Material
- Ceramic: Heats evenly, gentle on hair. Great for fine or damaged hair.
- Titanium: Heats up fast, retains heat well. Ideal for thick or coarse hair.
- Tourmaline: Emits negative ions to reduce frizz. Excellent for all hair types.
- Gold/Copper: Good heat conduction, often more affordable.
If you have curly hair or damaged strands, ceramic is your best friend.
3. Temperature Control
- Fine hair: 250–300°F (120–150°C)
- Normal hair: 300–380°F (150–190°C)
- Thick/coarse hair: 380–450°F (190–230°C)
Adjustable heat settings prevent unnecessary damage and give you more control over your styling results.
4. Shape & Taper
- Straight barrel: Consistent curl size from root to tip.
- Tapered barrel: Thicker at the base, thinner at the tip — creates more natural, varied curls.
- Bubble/curved barrel: Creates unique wave patterns.
Tapered wands are especially popular for creating beachy, effortless-looking curls.
How to Use a Curling Wand: Step-by-Step
- Section your hair: Divide your hair into manageable sections using clips. Start with the bottom layer and work your way up.
- Set the temperature: Choose the right heat setting for your hair type. Fine hair needs lower heat, thick hair needs higher heat.
- Wrap the hair around the barrel: Take a 1–2 inch section of hair, hold the wand vertically (or horizontally for different curl patterns), and wrap the hair around the barrel starting from the tip, leaving the ends out for a more natural look.
- Hold and release: Hold the hair for 5–15 seconds depending on your hair type and desired curl tightness. Release by gently unwinding the hair. Let it cool completely before touching.
- Repeat: Continue section by section. Alternate the direction you wrap for a more natural, multi-dimensional look.
- Finish with hold: Once cool, gently run your fingers through the curls to break them up for softer waves. Finish with a lightweight hair spray for hold.
Curling Wand Safety Tips
Protect Your Hair
Always use a heat protectant spray or serum before styling. This creates a barrier between your hair and the heat, preventing dryness and breakage. For extra protection, use a hair oil after styling to add shine and moisture.
Protect Your Hands
Most curling wands come with a heat-resistant glove — use it! It protects your fingers from accidental burns while wrapping hair around the barrel.
Don't Overheat
Use the lowest effective heat setting. Over-styling at high temperatures can cause permanent damage, especially if you have damaged hair.
Let Curls Cool
Allow each curl to cool completely before touching or brushing. This sets the curl and makes it last much longer. For more hold, try pinning each curl to your head while it cools.
Common Curling Wand Mistakes to Avoid
- Using the wrong barrel size: Match the barrel to your desired curl type and hair length.
- Not prepping hair: Always use heat protectant and ensure hair is 100% dry.
- Wrapping too much hair: Overloading the wand leads to uneven curls. Use small sections for best results.
- Holding for too long: Excessive heat exposure damages hair. Start with shorter hold times and adjust as needed.
- Not cleaning the wand: Product buildup affects heat distribution. Wipe the barrel with a damp cloth after each use.
Curling Wand vs. Other Styling Tools
If you're deciding between a curling wand and other tools like a hair straightener or curling iron, consider your styling goals. A curling wand is ideal for loose, natural waves, while a curling iron with a clamp gives more defined curls. For ultra-sleek styles, a hair straightener is your best bet. Meanwhile, hot rollers are great for voluminous, bouncy curls without direct heat exposure.
Many beauty enthusiasts also incorporate beauty tools like a jade roller or gua sha into their routine for added relaxation and skin benefits. However, when it comes to heat styling, a curling wand offers the most versatility for natural-looking curls.