Emo Makeup: The Complete Guide to Dark, Bold & Expressive Looks
Master smudged eyeliner, dramatic eyes, and statement lips with our step-by-step emo makeup tutorial. Designed for beginners who want a look that is authentically expressive, not just costume-deep.
START THE GUIDEWhat Defines Emo Makeup?
Emo makeup is not a single look — it is a philosophy of self-expression built around contrast, rawness, and intentional imperfection. The style emerged from the emo music subculture and evolved through scene, goth, and alternative fashion. At its core, emo makeup uses dark, heavy eyeliner, smudged textures, and bold lips to create a look that feels emotionally honest and visually striking.
Unlike polished beauty trends that conceal every flaw, emo makeup celebrates edges, shadows, and a little bit of mess. The classic emo eye features thick black liner that wraps the waterline, often smudged downward or outward for a brooding effect. Eyeshadow leans into charcoal, burgundy, and deep plum tones. Lips can range from nude with a dark liner to full black or blood-red depending on your mood.
If you are new to alternative beauty, start by exploring foundational techniques in our getting started guide and our broader beauty tools resource. Emo makeup builds on basic application skills, so a solid foundation makes the dramatic elements much easier to control.
Prep Your Canvas: Base and Complexion
Emo makeup often pairs heavy eye and lip detail with a relatively clean, matte complexion. The goal is contrast: the darker the eyes and lips, the more the skin should read as a neutral backdrop. However, some emo looks lean into pale, almost porcelain finishes — it depends on the sub-style you are going for.
Cleanse and Prime
Start with a gentle cleanser suited to your skin type. If you have dry or sensitive skin, a cleanser for dry sensitive skin will prevent the flakiness that heavy makeup can amplify. Follow with a lightweight moisturizer and a mattifying primer to help base products hold through long nights and heavy eye makeup.
Foundation and Concealer
Choose a foundation with medium to full coverage and a matte or satin finish. For emo looks, avoid overly dewy bases — they compete with the drama of the eyes. Apply with a foundation brush or damp sponge for an even layer. Conceal under the eyes, but keep the concealer lighter than your foundation if you want the classic hollow-eyed emo contrast.
Set the base lightly with translucent powder. A powder brush helps distribute product evenly without disturbing the foundation. If you want a paler, more theatrical finish, you can use a foundation one shade lighter than your natural tone — a technique common in goth and emo styling.
Contour and Blush
Emo makeup usually downplays blush and bronzer. A subtle contour under the cheekbones can add angular definition, but keep it cool-toned rather than warm. If you want a flush of color, choose a muted rose or berry rather than peach. You can explore blush application techniques with a blush brush for precise placement.
The Emo Eye: Smudged Liner and Dramatic Detail
The eyes are the centerpiece of emo makeup. This is where the style lives or dies. The goal is depth, darkness, and a slightly undone quality. Below is a step-by-step approach that works for beginners and can be scaled up for more dramatic looks.
1 Prime the Eyelids
Use an eye primer or a light layer of concealer set with powder. This prevents creasing and helps dark shadows blend smoothly. Emo eye makeup often uses multiple layers of dark pigment, so a good base is essential.
2 Build a Dark Base Shadow
Start with a matte charcoal or deep brown shadow across the lid. Blend upward into the crease with a fluffy eyeshadow brush. Do not worry about perfect edges — soft, smoky diffusion is the goal. For a more intense look, layer a black shadow on the outer half of the lid.
3 Apply Heavy Eyeliner
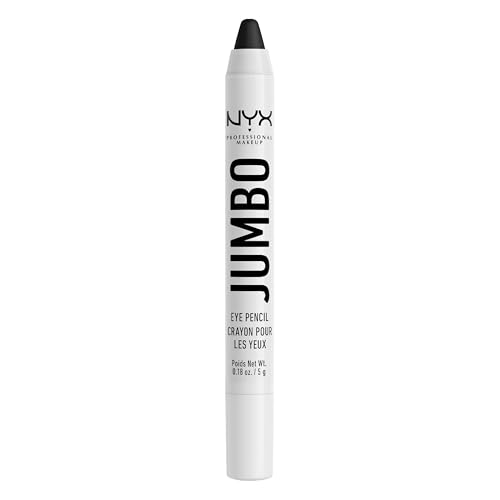
Use a black gel or liquid liner to draw a thick line across the upper lash line. Extend it slightly past the outer corner and wing it downward or straight out for a classic emo shape. Then line the lower waterline with a black or dark brown pencil — this is non-negotiable for the emo aesthetic.
4 Smudge Intentionally
Use a small smudge brush or your fingertip to soften the lower liner. Pull some of the black downward and outward to create that signature smudged, slightly tearful look. If you want more intensity, set the smudge with a matching dark shadow.
5 Add Mascara and Optional Lashes
Coat upper and lower lashes generously with a volumizing black mascara. For extra drama, apply a pair of cluster lashes or full strip lashes. Emo looks often favor spiky, separated lashes over a uniform fan — so do not over-comb after applying mascara.
6 Define the Brows
Emo brows tend to be defined but not overly sculpted. Fill sparse areas with a dark brow pencil or powder, then set with a clear brow gel or a tinted brow gel. Keep the shape natural but strong.
If you struggle with liner control, a eye curler guide and a steady hand technique will help. Also consider practicing with a brown mascara first if full black feels too intense — then graduate to black as your confidence grows.
Statement Lips and Finishing Touches
Emo lips can go in two directions: dark and dramatic (black, deep burgundy, blood red) or subtly defined (nude with a dark liner). Both are valid. The key is to choose one focal point — if your eyes are extremely heavy, you can go softer on the lips, and vice versa.
Dark Lips
For a full emo lip, start by lining the lips with a dark liner — black, deep plum, or burgundy. Fill in with a matching lipstick or liquid lip. A matte finish tends to work best for the classic look, but a slightly glossy dark lip can work for scene-inspired variations. If you want to explore lip color options, our blusher pink guide can help you understand color pairing, though emo looks usually avoid bright pinks in favor of deeper tones.
Nude with Dark Liner
For a more understated emo look, line the lips with a dark brown or black liner and fill with a nude or muted rose lipstick. This creates contrast without overwhelming the face. A homemade lip balm can be used underneath to keep lips comfortable during long wear.
Setting and Finishing
Set the face with a mattifying setting spray to lock everything in place. If you want to add a subtle highlight, keep it cool-toned and apply sparingly to the high points of the cheekbones. Avoid warm, golden highlights — they clash with the emo palette.
Choosing Products by Quality Tier
Emo makeup relies on pigment intensity and staying power, so product quality matters. But you do not need luxury products to get a great result. Here is how to think about tiers when building your kit.
Entry-Level
Drugstore liners and shadows can work well if you set them with powder and use a primer. Expect to reapply liner through the day. Good for experimenting with the style.
Mid-Range
Better pigment payoff and longer wear. Mid-tier gel liners and matte shadows are the sweet spot for most emo looks — reliable without being precious.
Premium
High-end liners and shadows offer intense color and minimal fallout. Worth it if you wear emo makeup regularly and want consistent performance.
Luxury
Luxury products often excel in texture and blendability, but the visible difference for emo looks is smaller than for everyday natural makeup. Invest only if you love the formula.
When building your kit, prioritize a good black gel liner, a matte black shadow, a smudge brush, and a dark lipstick. These four items will carry most emo looks. You can explore more tools in our beauty tools section and check our affordable makeup guide for budget-friendly options that still perform.
Common Emo Makeup Mistakes to Avoid
- Not priming the eyes: Dark shadows crease and fade quickly without a base. Always prime and set.
- Over-blending the liner: The smudge should be intentional, not accidental. Keep some definition at the lash line even after smudging.
- Ignoring the lower lash line: Emo makeup needs lower liner. Skipping it makes the look feel incomplete.
- Using warm-toned shadows: Warm oranges and golds fight the emo palette. Stick to cool charcoals, plums, and blacks.
- Neglecting lip prep: Dark lipstick shows every flake. Exfoliate and moisturize before applying.
- Going too heavy on the base: A cakey foundation distracts from the eyes. Keep the base clean and matte.
If you are also interested in related alternative styles, our 70s makeup guide shows how retro influences can inform modern expressive looks. And if you want to explore the broader world of cosmetics, our cosmetics overview is a useful starting point.
Frequently Asked Questions
Do I need special products for emo makeup?
No. A black gel liner, a matte black eyeshadow, a smudge brush, and a dark lipstick are enough to start. You can build from there as you refine your technique.
How do I keep emo eye makeup from smudging too much?
Use an eye primer, set the liner with a matching shadow, and avoid touching your eyes. A setting spray can help, but the smudged aesthetic means some movement is expected and even desired.
Can I wear emo makeup to school or work?
Yes, with adjustments. Scale down the intensity: use brown liner instead of black, skip the lower waterline, and choose a tinted lip balm instead of full dark lipstick. The emo spirit is about expression, not shock value.
What is the difference between emo and goth makeup?
Goth makeup tends to be more structured and theatrical, often with sharp geometric shapes and a pale, contoured base. Emo makeup is softer and more smudged, with a focus on emotional rawness rather than gothic drama.
How do I remove heavy emo makeup without irritation?
Use a double cleansing method: first an oil-based cleanser or micellar water to break down the makeup, then a gentle foaming cleanser. Our double cleansing routine guide explains the process step by step.
For more guidance on building a complete beauty routine around expressive looks, explore our beauty products directory and our beauty supply resources. If you are shopping for tools, our beauty store overview can help you compare options.
Ready to Own the Look?
Emo makeup is about confidence and self-expression. Start with the basics, practice the smudge, and let the look evolve with you. Below are our recommended products to help you get started.