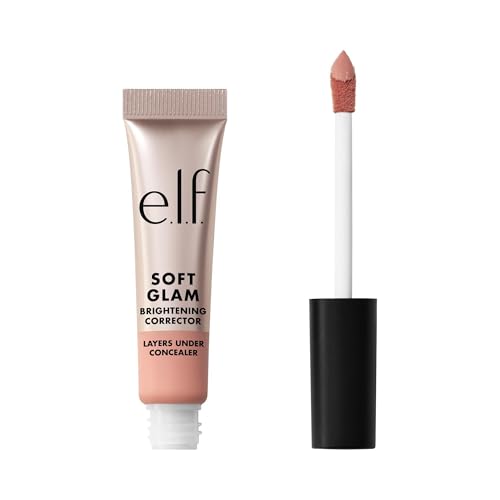
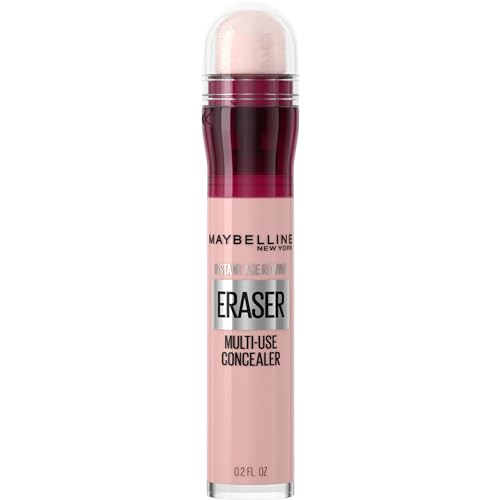
Color Corrector for Dark Circles: The Complete Guide
Discover how the right color corrector can neutralize stubborn under-eye shadows, brighten your gaze, and help you achieve a naturally rested, radiant look.
Dark circles are one of the most common beauty concerns — and one of the trickiest to conceal. No matter how much sleep you get, shadows, discoloration, and puffiness can make you look tired and drain the brightness from your face. That's where a color corrector for dark circles becomes a game-changer. Unlike a standard concealer that simply adds coverage, a color corrector uses color theory to cancel out the unwanted undertones beneath the skin, giving you a clean, even canvas before you even reach for foundation.
In this expert guide, we'll walk you through how color correction works, how to match the right shade to your skin tone, the application steps professionals rely on, and the pitfalls that cause creasing or an unnatural finish. Whether you're a makeup beginner or a seasoned enthusiast, understanding this technique is one of the most valuable skills in your routine. If you're building your collection from scratch, our getting started guide is a helpful companion.
What Is a Color Corrector for Dark Circles?
A color corrector is a concentrated pigment designed to neutralize specific undertones in the skin. Under-eye dark circles typically appear in shades of blue, purple, green, or brown, depending on your skin tone, circulation, and the thinness of the skin around the eyes. A corrector sits opposite those colors on the color wheel — for example, peach and orange cancel blue and purple, while green neutralizes redness. This is the same principle behind color correctors for redness, applied specifically to the delicate eye area.
The key difference between a corrector and a concealer is purpose. A concealer matches your skin tone and provides coverage; a corrector neutralizes discoloration first. Used together, they create a seamless, long-lasting result that looks like skin — not a mask. When chosen and applied correctly, a dedicated under-eye corrector can transform your entire makeup look.
How to Choose the Right Shade for Your Skin Tone
The most important step is matching the corrector to both your skin tone and the undertone of your dark circles. There is no universal shade — the wrong choice can make circles look ashy, grey, or overly orange. Use the table below as a starting point, then fine-tune based on your own reflection in natural light.
| Corrector Shade | Best For | Neutralizes |
|---|---|---|
| Light Peach | Fair to light skin tones with mild shadowing | Faint blue and purple undertones |
| Peach / Salmon | Light to medium skin tones, most common choice | Moderate blue and purple circles |
| Apricot / Deep Peach | Medium to tan skin tones | Deeper purple and blue shadows |
| Orange | Tan to deep skin tones with strong discoloration | Intense blue, purple, and brown darkness |
| Red / Brick | Deep to rich skin tones | Very dark, cool-toned circles |
| Yellow | Fair to medium skin with purple-blue tones | Mild purple and bluish shadow |
Matching by Undertone, Not Just Skin Tone
Your skin tone (fair, medium, deep) and your under-eye undertone are two different things. Some people with fair skin have deep purple circles that need a stronger peach, while some with deeper skin tones have brownish circles that respond better to an orange or red corrector. Start by identifying the dominant color of your dark circles in a mirror under neutral light:
- Blue or purple circles are most common and respond to peach, salmon, or orange correctors depending on depth.
- Brown circles often benefit from a peach-apricot tone; for deeper skin, an orange-toned corrector can work well.
- Greenish or grey circles (often from thin skin or visible veins) are best neutralized with a light peach or warm yellow.
- Redness around the eyes can be calmed with a green-tinted corrector, similar to the approach in our color correcting cream for redness guide.
If you're unsure, a mid-range peach corrector is the safest starting point for most light-to-medium skin tones, while a premium or high-end corrector often provides more blendable, finely milled pigments that are forgiving during the learning phase.
Step-by-Step Application for a Flawless Finish
Applying a corrector for dark circles is about precision and restraint. Too much product is the number one cause of creasing and cakey texture. Follow these steps for a smooth, natural result that lasts all day:
- Prep the skin. Start with a hydrating eye cream and allow it to absorb for a minute or two. A smooth, hydrated base helps product glide and prevents it from settling into fine lines. A quality eye cream is worth the investment.
- Apply a tiny amount of corrector. Use a small brush or your ring finger to tap a thin layer only on the areas where the darkness is visible. Start with less than you think you need — you can always add more.
- Blend gently. Tap or pat the product into the skin rather than dragging. A damp beauty blender or a small concealer brush works beautifully for a seamless edge.
- Layer with concealer. Once the corrector has neutralized the color, apply a concealer that matches your skin tone on top. This step is optional for a minimal look but essential for full coverage. Our guide on dark concealer for dark circles explains how to pair the two.
- Set with powder. Lightly dust a translucent setting powder over the area with a small fluffy brush. This locks everything in place and prevents creasing, especially in humid conditions.
Common Mistakes to Avoid
Even experienced makeup users run into trouble with correctors. Here are the most frequent mistakes and how to fix them:
- Using the wrong shade. A corrector that's too light or too orange will look obvious and unnatural. Match the intensity of the pigment to the depth of your discoloration.
- Applying too much product. A thin layer is enough. Excess corrector is the main cause of creasing and an ashy, heavy look.
- Skipping eye cream. Dry skin absorbs product unevenly and creases faster. Hydration is your best defense against settling.
- Not setting the area. A light powder set makes all the difference for longevity, especially on oily or combination skin.
- Dragging instead of tapping. Tapping blends the product into the skin without disturbing the delicate under-eye area.
Types of Color Correctors and What to Look For
Color correctors come in several formats, each with strengths and ideal use cases. Understanding the differences helps you choose the right one for your routine:
- Cream correctors offer rich pigmentation and are ideal for dry or mature skin. They blend beautifully but need setting to prevent creasing.
- Liquid correctors are lightweight and buildable, great for oily or combination skin and for layered makeup looks.
- Stick correctors are convenient for on-the-go touch-ups and precise application, though they can be firmer and require warming.
- Palette correctors include multiple shades for customizable mixing — a smart choice if you like to adjust the intensity for different days.
When shopping, look for finely milled pigments, a blendable texture, and a formula that's ophthalmologist-tested if you have sensitive eyes. Entry-level options can work well, but mid-range and premium formulas often offer better blendability and longer wear — a worthwhile upgrade if dark circles are a daily concern. For more tool recommendations, browse our beauty tools section.
Frequently Asked Questions
What color corrector should I use for dark circles?
The right shade depends on your skin tone and the undertone of your dark circles. Peach correctors work well for light to medium skin with blue or purple undertones, while orange and red correctors are best for deeper skin tones or very dark circles. Always match the corrector intensity to the depth of the discoloration.
Can I use color corrector without concealer?
Yes, you can use a color corrector on its own for a natural, minimal look. However, for fuller coverage and a seamless finish, layer a concealer that matches your skin tone on top. This combination neutralizes discoloration and blends everything together.
How do I prevent color corrector from creasing under my eyes?
Prep the under-eye area with a hydrating eye cream and let it absorb fully. Apply thin layers of corrector and concealer, then set with a light dusting of translucent powder using a small fluffy brush. Avoid applying too much product, as excess product is the main cause of creasing.
Is color corrector necessary for dark circles?
It's not strictly necessary, but it makes a significant difference for stubborn or deeply pigmented circles that concealer alone cannot fully hide. A corrector neutralizes the color first, so you need less concealer and get a more natural result.
Ready to Brighten Your Under-Eye Area?
Explore our curated selection of color correctors and under-eye products below, chosen to help you achieve a rested, radiant look.
View Recommended ProductsMastering the use of a color corrector for dark circles is a small step that delivers a big payoff. With the right shade, a light hand, and a consistent application routine, you can neutralize stubborn shadows and enjoy a brighter, more even under-eye area every day. Remember to patch-test new products and, if your dark circles are persistent or accompanied by other symptoms, consult a dermatologist to rule out underlying causes. For more beauty education, browse our beauty products hub and natural beauty guides.