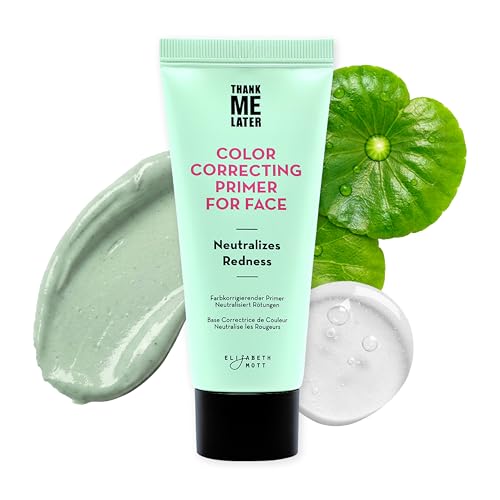
Color Corrector for Redness: The Complete Guide to Flawless Skin
Discover how green color correctors neutralize redness, soothe irritation, and create a smooth canvas for foundation. Learn application techniques, product selection, and expert tips for rosacea, acne, and sensitive skin.
Explore the GuideWhy Color Correcting Matters: Redness from rosacea, acne, sunburn, or irritation can be frustrating to cover with foundation alone. A color corrector for redness neutralizes the red undertone before you apply concealer or foundation, resulting in a more even, natural-looking complexion that lasts longer throughout the day.
What Is a Color Corrector for Redness?
A color corrector for redness is a makeup product formulated with green pigments that neutralize red tones on the skin. Based on color theory, green sits directly opposite red on the color wheel, meaning the two colors cancel each other out when layered. This makes green color correctors an essential tool for anyone dealing with rosacea, acne-related redness, broken capillaries, sunburn, or general skin sensitivity.
Unlike concealer, which simply covers imperfections with a skin-toned pigment, a color corrector addresses the underlying color imbalance. When applied correctly beneath foundation or concealer, a green corrector creates a neutral base that allows your base makeup to look more natural and requires less product to achieve full coverage. If you are building a complete makeup routine, understanding color correction is a foundational skill — similar to mastering the basics covered in our getting started guide.
Color correctors come in several formats: liquid, cream, stick, and powder. Each has its own advantages depending on your skin type and the intensity of redness you need to neutralize. Liquid formulas are ideal for large areas and oily skin, while cream and stick formulas offer more precise targeting for spots and broken capillaries.
How Green Color Correctors Work on Redness
The science behind color correcting is rooted in complementary color theory. Green and red are opposite each other on the color wheel, so when green pigment is applied over a red area, the two wavelengths cancel each other out, producing a neutral tone. This is the same principle used by artists and photographers, and it has been adapted for cosmetics to help create an even complexion.
Here is what happens when you apply a green corrector:
- Neutralization: The green pigment cancels the red undertone, making the area appear more neutral and less inflamed.
- Coverage Boost: Because the redness is neutralized first, you need less foundation or concealer to achieve a flawless finish.
- Longevity: Color-corrected skin tends to hold makeup better because the base is balanced and less likely to show through throughout the day.
- Reduced Product Waste: Using a corrector means you can use lighter layers of foundation, which looks more natural and feels lighter on the skin.
It is important to note that color correctors are not meant to replace skincare. If you have persistent redness, addressing the root cause with a gentle cleanser and appropriate treatment is essential. For those with sensitive or reactive skin, pairing a corrector with a soothing organic face cream can help calm irritation before makeup application.
Types of Color Correctors for Redness
Not all green correctors are created equal. The right format depends on your skin type, the size of the area you need to correct, and your preferred application method. Below is a comparison of the most common types:
| Type | Best For | Coverage | Skin Type |
|---|---|---|---|
| Liquid Corrector | Large areas, diffuse redness, rosacea | Sheer to medium | Oily, combination |
| Cream Corrector | Precise spots, broken capillaries, acne marks | Medium to full | Dry, mature |
| Stick Corrector | On-the-go touch-ups, targeted spots | Full | All skin types |
| Powder Corrector | Setting makeup, oily skin touch-ups | Sheer | Oily, combination |
| Tinted Primer | All-over redness, makeup base | Sheer | All skin types |
For beginners, a liquid or tinted primer is often the easiest entry point because it blends seamlessly and is forgiving during application. Those with more pronounced redness or specific spots may prefer a cream or stick formula for targeted correction. If you are also dealing with dark circles, a dedicated color corrector for dark circles in peach or orange tones may be needed alongside your green corrector.
How to Apply Color Corrector for Redness: Step-by-Step
Proper application is the key to making a color corrector work effectively. Follow these steps for a seamless, natural-looking result:
-
1
Start with clean, moisturized skin. Begin your routine with a gentle cleanser and a lightweight moisturizer. If you have sensitive skin, a calming organic toner can help prep the skin and reduce irritation before makeup.
-
2
Apply primer (optional). A gripping primer helps the corrector adhere and extend wear time. For oily skin, a mattifying primer works well; for dry skin, a hydrating primer is preferred.
-
3
Dot or swipe the corrector onto red areas. Use your fingertips, a small brush, or a damp makeup sponge. Apply a thin layer — start with less product and build up as needed. For diffuse redness, apply in sheer layers across the cheeks, nose, and chin.
-
4
Blend gently but thoroughly. Use a tapping motion rather than rubbing, which can disturb the pigment. A beauty blender or a small foundation brush works well. Make sure edges are blended seamlessly into the surrounding skin.
-
5
Let it set for a moment. Allow the corrector to settle into the skin before applying foundation. This prevents the layers from mixing and ensures maximum color-neutralizing effect.
-
6
Apply foundation or concealer. Use a light hand and build coverage as needed. The goal is to even out the skin tone, not to mask it completely. A medium-coverage foundation applied with a damp sponge gives a natural finish.
-
7
Set with powder. A translucent setting powder locks everything in place and prevents shine. For touch-ups throughout the day, a compact green powder corrector can be used sparingly on areas that show redness.
Pro Tip: If your redness is very intense, use a peach-toned corrector first to knock down the deep red, then follow with a green corrector for a more balanced result. This layering technique is especially helpful for rosacea and post-acne redness.
How to Choose the Best Color Corrector for Redness
Selecting the right corrector involves more than just picking the greenest product on the shelf. Consider these factors to find the formula that works best for your skin:
1. Match the Correct shade of green
Green correctors come in different intensities. A pale mint green works well for mild redness and fair skin, while a deeper forest green is more effective for intense redness and deeper skin tones. Some brands offer color-correcting palettes with multiple green tones, allowing you to customize the intensity.
2. Consider your skin type
Oily skin benefits from oil-free, liquid, or powder formulas that won't slide or crease. Dry skin should look for cream or stick formulas with hydrating ingredients like hyaluronic acid or glycerin. Sensitive skin should opt for fragrance-free, non-comedogenic formulas to avoid further irritation.
3. Check the finish
Matte finishes are ideal for oily skin and long-wear makeup, while satin or dewy finishes suit dry and mature skin. If you plan to layer foundation over the corrector, a matte or semi-matte finish prevents the layers from slipping.
4. Look for skincare benefits
Many modern color correctors include skincare ingredients such as niacinamide, green tea extract, or centella asiatica, which can help soothe redness over time. If you have reactive skin, consider pairing your corrector with a green tea skincare routine to calm inflammation.
5. Test the texture
Some correctors are thick and opaque, while others are sheer and blendable. If you prefer a natural look, a sheer liquid or tinted primer may be your best bet. For full coverage, a cream or stick formula delivers more pigment.
6. Consider the packaging
Stick and tube formats are convenient for travel and touch-ups, while pump bottles and pots are better for at-home use. If you have limited storage space, a compact stick or a multi-purpose palette is a smart choice — see our beauty storage ideas for keeping your makeup organized.
Common Mistakes to Avoid When Using Green Color Corrector
Even experienced makeup users can run into trouble with color correcting. Here are the most common mistakes and how to fix them:
- Using too much product: A little goes a long way. Over-applying green corrector can leave a visible green cast that is hard to cover with foundation. Start with a pea-sized amount and build up.
- Skipping moisturizer: Dry skin makes color correctors look patchy and emphasizes texture. Always prep your skin with a hydrating moisturizer before applying color-correcting products.
- Rubbing instead of tapping: Rubbing can lift the pigment and create streaks. Use a tapping or stippling motion with a damp sponge or fingertips.
- Applying corrector over powder: Color correctors should be applied to bare or moisturized skin, not over powder. Powder creates a barrier that prevents the corrector from blending properly.
- Using the wrong shade of green: A green that is too dark or too light for your skin tone can look unnatural. Test the corrector on your jawline to ensure it blends well with your complexion.
- Not setting the makeup: Without a setting powder or spray, the corrector and foundation can slide or fade throughout the day. Use a translucent powder or a setting spray to lock everything in place.
Color Correctors for Specific Redness Concerns
Different types of redness require slightly different approaches. Here is how to tailor your color-correcting routine to specific skin concerns:
Rosacea
Rosacea causes persistent redness, often on the cheeks and nose, along with visible blood vessels. A green tinted primer applied all over the face provides a base layer of neutralization, followed by a cream corrector on the most affected areas. Choose fragrance-free, gentle formulas and avoid rubbing or over-blending. Pair with a soothing skincare routine that includes a gentle cleanser and mineral sunscreen to protect against triggers.
Acne and Post-Acne Marks
Active acne and post-inflammatory redness can be addressed with a targeted stick or cream corrector. Apply a small amount directly to the spot and blend the edges outward. Be careful not to apply too much product around active breakouts, as this can emphasize texture. For overall acne-prone skin, a lightweight liquid corrector works well as a base.
Sunburn and Windburn
Sunburn and windburn cause diffuse redness that can be uncomfortable. Use a soothing, hydrating corrector with ingredients like aloe vera or aloe vera and centella asiatica. Avoid mattifying formulas, which can dry out already-compromised skin.
Broken Capillaries and Veins
Visible capillaries on the nose and cheeks require precise, full-coverage correction. A stick or cream corrector applied with a small brush gives the most control. Set with a fine translucent powder to prevent the corrector from migrating.
Complementary Makeup Products for Redness-Prone Skin
Color correctors work best as part of a complete makeup routine. Here are some complementary products that enhance the effect and help you achieve a flawless finish:
- Green-tinted primer: Provides an all-over base of neutralization, especially helpful for rosacea and diffuse redness.
- Full-coverage foundation: A medium-to-full coverage foundation applied over the corrector delivers a seamless, even finish.
- Concealer: A concealer in your skin tone can be used to spot-correct any remaining redness or imperfections.
- Setting powder: A translucent setting powder locks in the corrector and prevents shine.
- Setting spray: A setting spray adds a final layer of hold and can help refresh makeup throughout the day.
- Color-correcting palette: A palette with green, peach, and yellow correctors is a versatile investment for addressing multiple concerns at once.
- Makeup brushes: A small eyeshadow brush or precision concealer brush is ideal for targeted correction.
Frequently Asked Questions About Color Corrector for Redness
Yes, green color correctors are safe for daily use. Choose a gentle, non-comedogenic formula and always remove it thoroughly at the end of the day with a proper double cleansing routine to prevent clogged pores.
Even full-coverage foundation can struggle with intense redness. A color corrector neutralizes the red before foundation is applied, resulting in a more natural finish and less product needed overall. It also helps prevent redness from peeking through throughout the day.
A green primer is typically sheer and designed to be applied all over the face as a makeup base. A green color corrector is more pigmented and intended for targeted application on specific areas of redness. Primers are more forgiving and easier to use for beginners, while correctors offer more precise coverage.
Some color correctors can cause breakouts if they contain comedogenic ingredients or if they are not removed thoroughly. Look for oil-free, non-comedogenic formulas, and always cleanse the skin thoroughly at the end of the day. If you are acne-prone, patch-test new products before applying them to the full face.
Fair skin tones generally benefit from lighter, mint-green correctors, while deeper skin tones may need deeper green shades to effectively neutralize redness. If you are unsure, opt for a sheer, buildable formula that allows you to control the intensity, or choose a color-correcting palette that includes multiple green tones.
Yes, color correctors can be used on the body to neutralize redness from sunburn, irritation, or scarring. However, body skin is often drier and thicker than facial skin, so a cream or stick formula may be more comfortable and effective.
Final Thoughts: Mastering Color Correction for Redness
A color corrector for redness is one of the most effective tools in a makeup kit for anyone dealing with rosacea, acne, sunburn, or general skin sensitivity. By understanding the principles of color theory and choosing the right formula for your skin type, you can neutralize redness, reduce the amount of foundation needed, and achieve a more natural, even complexion.
Remember that color correcting is just one part of a complete beauty routine. Pair your corrector with gentle skincare, a quality beauty tools collection, and a consistent self-care routine to keep your skin healthy and happy. If you are new to makeup, our affordable makeup guide can help you build a starter kit without breaking the bank.
Whether you are prepping for a special occasion or simply want to feel more confident in your daily look, mastering the art of color correction is a skill that pays off. Explore our recommended products below to find the best color corrector for your needs.