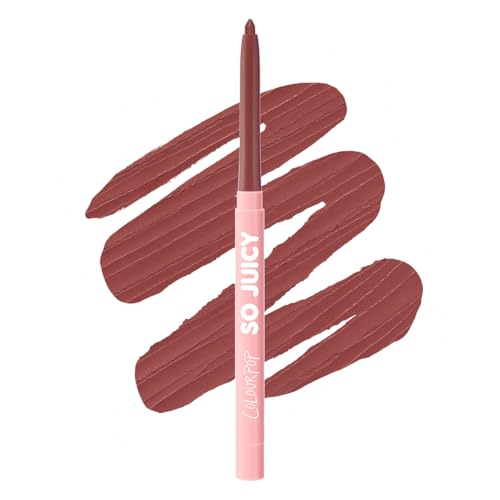
Lip Liner for Fuller Lips: The Ultimate Guide
Discover the secrets to creating a perfectly plump pout. From selecting the right shade to mastering overlining techniques, this guide covers everything you need for a fuller, more defined lip look.
✨ Top pick: long-wear, smudge-proof formulasWhy lip liner is your secret weapon: A well-chosen lip liner not only defines your lips but also creates the illusion of volume, prevents feathering, and extends the wear of your lipstick. Whether you're aiming for a subtle boost or a dramatic pout, mastering lip liner is a game-changer.
Many people overlook the power of a good lip liner, but it is one of the most effective makeup products for enhancing your natural features. It acts as a blueprint for your lips, allowing you to correct asymmetry, balance proportions, and create a more voluptuous shape.
1. How to Choose the Perfect Lip Liner Shade
Selecting the right color is crucial for a natural-looking fuller lip. The general rule is to choose a liner that is one to two shades darker than your natural lip color or matches your lipstick exactly. For a more defined look, consider these options:
Nude & My-Lips-But-Better
Ideal for everyday wear, these shades enhance your natural lip shape without looking overdone. Look for a liner that matches the inside of your lower lip for the most natural effect.
Bold & Statement Colors
For a glamorous look, opt for a liner that matches your lipstick (e.g., red, berry, or plum). A matching liner ensures a crisp, defined edge and prevents your lipstick from bleeding.
Contrasting Liner
Using a darker liner with a lighter lipstick can create an ombre effect that visually plumps the lips. This technique is perfect for adding depth and dimension.
2. Step-by-Step Application for Fuller Lips
How you apply your lip liner is just as important as the shade you choose. Follow these steps to achieve a flawless, fuller pout.
- Prep & Prime: Start with exfoliated, hydrated lips. A smooth canvas ensures your liner glides on evenly. Consider using a lip oil for dry lips to add moisture.
- Outline the Cupid's Bow: Begin by defining your Cupid's bow. For a fuller look, slightly overline the center of your upper lip, but be careful not to go too far outside your natural lip line.
- Define the Bottom Lip: Draw a line along the center of your bottom lip, then work your way outwards. To create more volume, slightly overline the center of the bottom lip as well.
- Fill In: For long-lasting color, fill in your entire lip with the liner. This creates a base for your lipstick or gloss and prevents fading.
- Blend & Finish: Apply your lipstick or gloss, and for an extra plumping effect, dab a bit of clear gloss or highlighter to the center of your lips.
Pro Tip: To avoid a harsh line, gently blend the liner towards the center of your lips with a lip brush or your finger before applying lipstick. This creates a more natural gradient.
3. Mastering the Overlining Technique
Overlining is the most effective trick for instantly fuller lips. The key is subtlety. Here’s how to do it right:
- Focus on the Center: Overline only the center portions of your upper and lower lips. This creates a pouty effect without looking unnatural.
- Avoid the Corners: Do not overline the corners of your mouth. This can make your lips look clownish and unnatural.
- Use a Matte Formula: Matte lip liners are easier to control and stay in place longer, making them ideal for the overlining technique.
4. Choosing the Right Formula
The formula of your lip liner affects both the ease of application and the final look. Here are the most common types:
Wooden Pencil
Classic and precise, these liners are great for sharp lines. They often have a drier texture, which provides a long-lasting, smudge-proof finish.
Mechanical/Automatic
Convenient and creamy, these liners are perfect for beginners. They glide on easily and are available in a wide range of shades.
Liquid Lip Liner
For ultimate precision and longevity, liquid liners are a great option. They dry down to a smudge-proof, transfer-proof finish.
Regardless of which formula you choose, always look for a liner that is highly pigmented and comfortable to wear. For a more defined look, you can pair your liner with a cream blush for mature skin to create a cohesive, polished makeup look.
5. Common Mistakes & How to Fix Them
Too Dark or Harsh
Fix: Blend the liner towards the center of your lips with a lip brush. You can also soften the line by gently patting it with your fingertip.
Feathering/Bleeding
Fix: Use a lip primer or a concealer around the edges of your lips before applying your liner. This creates a barrier that prevents bleeding.
Uneven or Wobbly Lines
Fix: Rest your elbow on a flat surface for stability. For a quick fix, use a small, flat brush dipped in concealer to clean up and perfect the edges.
6. Expert Product Picks
To achieve the perfect fuller lip look, the right tools are essential. Here are some of our favorite lip liners and complementary products that deliver outstanding results. For a complete makeup bag, you might also explore our guide on makeup bag essentials.
For those who love a glossy finish, a good clear lip gloss on lips can amplify the plumping effect when applied over a well-defined lip liner. If you're looking for a more long-lasting solution, try pairing your liner with a lip stain for a natural flush of color that stays put.
Final Thoughts
Mastering lip liner for fuller lips is a skill that can dramatically enhance your overall makeup look. Whether you're a beginner or a seasoned makeup enthusiast, the tips and techniques in this guide will help you achieve a perfectly defined, voluminous pout. Remember, practice makes perfect, so don't be afraid to experiment with different shades and formulas to find what works best for you.
For more expert advice on achieving a flawless makeup look, check out our guides on soft glam makeup and makeup for sensitive skin.