Microblading Eyebrows: The Complete Guide to Semi-Permanent Brows
Everything you need to know about microblading — from the procedure and healing process to aftercare, results, and choosing the right artist for natural, flawless brows.
What Is Microblading?
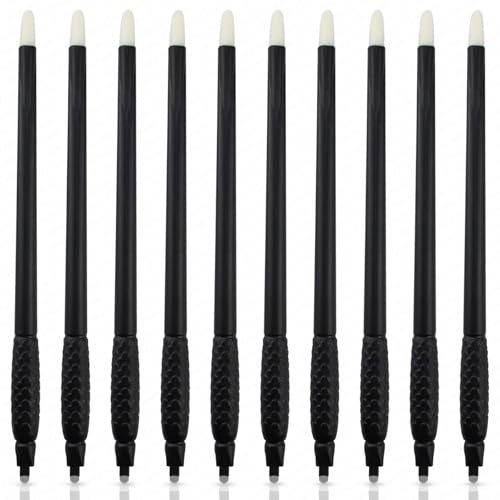
Microblading is a semi-permanent makeup technique used to create fuller, more defined eyebrows. Unlike traditional cosmetic tattooing, microblading uses a handheld tool with a row of ultra-fine needles to deposit pigment into the upper layers of the skin. The result is a series of delicate, hair-like strokes that blend naturally with your existing brows.
This technique is ideal for anyone who wants to correct sparse, thin, or uneven eyebrows, or who simply wants to wake up with perfectly shaped brows every day. Because the pigment is placed more superficially than in traditional tattoos, results are softer and typically last between 12 and 18 months before a touch-up is needed.
Key point: Microblading is a form of semi-permanent makeup, not a permanent tattoo. It fades gradually over time, giving you flexibility to change your brow shape in the future.
If you are still deciding between different brow enhancement methods, it helps to understand how microblading compares with other options. For a deeper comparison, explore microblading vs powder brows to see which technique suits your skin type and lifestyle best. You can also read more about the broader category of semi-permanent brow treatments and how they fit into a complete permanent makeup routine.
How the Microblading Procedure Works
A typical microblading session takes about two hours from start to finish. The process is methodical and focuses on precision, comfort, and natural-looking results.
Step 1: Consultation and Brow Mapping
Your artist will begin by discussing your goals, skin type, and brow history. Using a measuring tool, they will map out the ideal brow shape based on your facial proportions. You will review and approve the shape before any pigment is applied.
Step 2: Numbing
A topical numbing cream is applied to the brow area to minimize discomfort. Many artists also use a secondary numbing gel during the procedure to keep you comfortable throughout.
Step 3: Pigment Application
Using the microblading tool, the artist creates fine, hair-like strokes along the brow shape. The pigment is matched to your natural brow color and skin undertone. Each stroke is placed deliberately to mimic the direction and thickness of natural hair growth.
Step 4: Review and Touch-Up Planning
After the initial strokes are complete, the artist reviews the result with you. A touch-up session is usually scheduled 6 to 8 weeks later to perfect the shape and fill in any areas that healed lighter than expected.
Session Duration
Around 2 hours for the initial appointment, including consultation, mapping, and numbing.
Discomfort Level
Mild. Numbing cream makes the procedure tolerable for most clients.
Touch-Up
A follow-up session at 6 to 8 weeks is standard to refine and perfect results.
Who Is a Good Candidate for Microblading?
Microblading works best for people with normal to slightly dry skin and those who want a natural, hair-stroke finish. However, it is not ideal for every skin type. Understanding your skin condition helps set realistic expectations.
Ideal Candidates
- People with sparse, thin, or uneven eyebrows
- Those who want to save time on daily brow makeup
- Individuals with normal to dry skin
- Anyone looking for a natural, feathery brow look
- People who have lost brow hair due to over-plucking or aging
Who Should Consider Alternatives
- Those with very oily skin — pigment may blur or fade faster
- People with large pores on the brow area
- Anyone prone to keloid scarring
- Pregnant or nursing women
- Individuals undergoing certain medical treatments (consult your doctor first)
If you have oily skin, a shading technique such as powder brows may be a better fit. Learn more in our guide to powder brows and compare it directly with microblading vs powder brows.
Microblading vs Other Brow Treatments
There are several ways to enhance your eyebrows, and each method suits different needs. Here is a clear comparison to help you decide.
| Technique | Finish | Best For | Longevity |
|---|---|---|---|
| Microblading | Hair-like strokes | Normal to dry skin, natural look | 12–18 months |
| Powder Brows | Soft, shaded fill | Oily skin, filled-in look | 18–24 months |
| Traditional Tattoo | Solid block color | Dramatic, long-lasting results | 2–3 years |
| Brow Extensions | Individual fibers | Temporary volume | 2–3 weeks |
Each option has trade-offs. Microblading offers the most natural appearance but requires more frequent touch-ups than powder brows. If you are exploring related treatments, you may also find our guide on micro-needling useful for understanding how controlled skin trauma can support collagen production and skin renewal. For those interested in other semi-permanent options, our overview of permanent makeup covers the broader landscape.
Microblading Healing Process and Aftercare
Proper aftercare is essential for the best possible results. The healing process happens in stages, and understanding what to expect helps you avoid panic and protect your investment.
Healing Timeline
- Days 1–3: Brows appear dark and bold. Slight redness and tenderness are normal.
- Days 4–7: Flaking and peeling begin. Brows may look patchy as pigment settles.
- Days 7–14: Flaking completes. Color may appear lighter than expected.
- Weeks 2–4: Color gradually resurfaces as the skin finishes healing.
- Weeks 6–8: Final results are visible. This is when the touch-up session is typically scheduled.
Aftercare Tips
- Keep the brow area clean and dry for the first 7–10 days.
- Apply the recommended healing ointment sparingly as directed by your artist.
- Avoid sweating, swimming, and saunas during the initial healing period.
- Do not pick or scratch the flaking skin — let it fall off naturally.
- Avoid direct sun exposure and use sunscreen once healed.
- Skip makeup on the brows until fully healed.
Important: Healing varies from person to person. If you notice signs of infection such as excessive redness, swelling, or pus, contact your artist or a healthcare professional immediately.
Supporting your skin health during healing can make a difference. Consider gentle skincare practices and avoid harsh actives on the brow area. If you want to explore complementary skin treatments after healing, our guide on skin care clinics and skin rejuvenation treatments can help you plan next steps.
How to Choose the Right Microblading Artist
The skill of your artist is the single most important factor in achieving natural, beautiful results. Take your time during the selection process.
What to Look For
- Portfolio: Review healed results, not just fresh photos. Healed work reveals true skill.
- Certification: Look for proper training and licensing in your area.
- Hygiene: The studio should be clean, sterile, and use single-use tools.
- Consultation: A good artist will listen to your goals and be honest about what is achievable.
- Reviews: Check testimonials and before-and-after galleries from real clients.
Questions to Ask During Consultation
- How many microblading procedures have you performed?
- Can I see healed results from past clients?
- What pigment brand do you use?
- What is your touch-up policy and pricing structure?
- What aftercare instructions do you provide?
Choosing an experienced artist ensures safer, more predictable outcomes. If you are also considering other beauty investments, our guides on beauty tools and skincare brands can help you build a well-rounded routine.
Risks and Considerations
While microblading is generally safe when performed by a trained professional, it is important to be aware of potential risks and limitations.
Possible Risks
- Allergic reaction to pigment or numbing agents
- Infection if aftercare instructions are not followed
- Uneven color or shape requiring additional touch-ups
- Scarring, especially in those prone to keloids
- Fading or blurring, particularly on oily skin
Realistic Expectations
Microblading is not a permanent solution. Results fade over time, and touch-ups are part of the maintenance routine. The final result depends on your skin type, lifestyle, artist skill, and aftercare compliance. Setting realistic expectations before the procedure helps ensure satisfaction.
For a comprehensive understanding of semi-permanent and permanent options, revisit our microblading overview and compare it with other permanent makeup services. If you have any doubts, consult with a certified professional and review our disclaimer for important health and safety information.
Frequently Asked Questions About Microblading
How long does microblading last?
Results typically last between 12 and 18 months. An annual touch-up is recommended to maintain shape and color.
Is microblading painful?
Most clients experience mild discomfort. A topical numbing cream is applied before and during the procedure to keep pain minimal.
What is the difference between microblading and powder brows?
Microblading creates individual hair-like strokes, while powder brows use a shading technique for a soft, filled-in look. The best choice depends on your skin type and desired finish. See our full comparison guide.
How long does microblading healing take?
Initial healing takes about 7 to 14 days. Full healing and color settling occur over 4 to 6 weeks, with a touch-up session scheduled at 6 to 8 weeks.
Can I wear makeup after microblading?
Avoid brow makeup and harsh skincare products on the treated area until fully healed, typically 10 to 14 days.
Is microblading suitable for oily skin?
Microblading can work on oily skin, but pigment may blur or fade faster. Powder brows or a combination technique may be more suitable. Learn more in our powder brows guide.
Final Thoughts
Microblading eyebrows is a transformative treatment for anyone seeking fuller, more defined brows with minimal daily effort. By understanding the procedure, healing process, and aftercare requirements, you can make an informed decision and enjoy beautiful, natural-looking results. Always choose a qualified artist, follow aftercare instructions diligently, and set realistic expectations. Your brows deserve the best care — and the right preparation makes all the difference.