
Contouring Stick Guide: Sculpt & Define Like a Pro
Unlock the secret to chiseled cheekbones and a sculpted jawline. Learn how to choose, apply, and blend the perfect contouring stick for a natural, radiant look.
Shop Top Contour SticksA contouring stick is one of the most versatile and beginner-friendly tools in modern makeup. Whether you're a seasoned artist or just starting your beauty journey, a cream contour stick offers effortless application, blendable texture, and buildable coverage that works for every skin type. Unlike powder contours, which can sometimes look harsh or settle into fine lines, a contouring stick melts into the skin, creating a natural shadow that mimics the way light and shade interact on your face.
This comprehensive guide will walk you through everything you need to know: from choosing the right shade and undertone, to step-by-step application techniques, to expert tips for a seamless finish. By the end of this page, you'll have the confidence and knowledge to select the best contouring stick for your needs and achieve a sculpted look that's both stunning and natural.
What Is a Contouring Stick?
A contouring stick is a cream-based makeup product designed to sculpt and define facial features. It typically comes in a twist-up or pencil format, making it easy to apply directly to the skin. The formula is usually creamy, blendable, and highly pigmented, allowing for precise placement and seamless blending with a brush, sponge, or fingers.
Contouring sticks are available in a range of shades, from cool-toned taupes for fair skin to deep espresso for rich complexions. The key to a natural contour is choosing a shade that mimics the natural shadow of your face—typically 1–2 shades darker than your skin tone with a cool or neutral undertone.
Why Choose a Contouring Stick?
Effortless Application
No brushes? No problem. The stick format allows for direct, precise application on the go. Perfect for travel or quick touch-ups.
Blendable & Buildable
Enjoy a natural finish that builds from subtle definition to dramatic sculpting. The creamy texture blends effortlessly into skin.
Versatile Use
Use it to contour cheekbones, jawline, nose, temples, and even the collarbone. A single stick can be your all-in-one sculpting tool.
Perfect for All Skin Types
Whether you have dry, oily, or combination skin, a cream contour stick offers a flattering finish without emphasizing texture.
How to Choose the Perfect Shade
Selecting the right contouring stick shade is crucial for achieving a natural look. Here are some expert tips:
- Undertone Matters: For a natural shadow, choose a contour shade with a cool or neutral undertone. Warm-toned contours can look orange or muddy on the skin.
- 1–2 Shades Darker: The ideal contour shade is about 1–2 shades darker than your natural skin tone. If you're between shades, opt for the lighter one—you can always build intensity.
- Test on Your Jawline: The best way to test a contour shade is to swipe it along your jawline. The shade should blend seamlessly into the shadow of your jaw.
- Consider Your Skin Depth: Fair skin: cool taupe or light beige. Medium skin: warm sand or golden brown. Dark skin: deep espresso or rich mahogany.
Pro Tip: When in doubt, opt for a contour stick that is described as "cool-toned" or "neutral" rather than "warm" for the most natural-looking sculpt.
Step-by-Step Application Guide
Mastering the art of contouring with a stick is easier than you think. Follow this simple step-by-step guide for a flawless finish:
- Prep Your Skin: Start with a clean, moisturized face. Apply your favorite foundation or tinted moisturizer to create an even base.
- Map Your Face: Draw lines with the contouring stick where shadows naturally fall: hollows of the cheeks, along the jawline, temples, and the sides of your nose.
- Blend, Blend, Blend: Use a damp beauty sponge, a dense brush, or your fingers to blend the contour lines outward. Always blend in an upward motion to lift the face.
- Set with Powder: For a long-lasting finish, lightly set your contour with a translucent powder. This helps lock the cream contour in place.
- Add Highlighter: For a truly sculpted look, apply highlighter to the high points of your face (cheekbones, brow bone, cupid's bow) to enhance the contrast.
Remember, less is more. Start with a small amount and build up as needed. The goal is to enhance your natural features, not to create harsh stripes.
Pro Tips for a Flawless Contour
- Placement is Key: For a natural look, place the contour line just below your cheekbone. You can find the hollow by sucking in your cheeks.
- Blend with a Sponge: A damp beauty sponge provides a airbrushed, skin-like finish. Use a stippling motion to avoid streaks.
- Don't Forget the Blending Brush: A dense, domed brush (like a foundation brush) works wonders for blending contour into the skin for a seamless look.
- Set with a Match: If you've used a cream contour, set it with a powder contour in a similar shade for extended wear.
- Practice Makes Perfect: Don't be discouraged if it doesn't look perfect the first time. Contouring is a skill, and practice truly makes perfect.
For more expert advice on achieving a flawless makeup look, check out our makeup tutorial and step-by-step makeup guide.
Common Mistakes to Avoid
- Too Dark: Using a contour stick that is too dark can look unnatural and patchy. Stick to 1–2 shades darker than your skin tone.
- Wrong Undertone: Warm-toned contours can look orange on cool-toned skin. Choose a shade that matches your skin's undertone.
- Not Blending Enough: Unblended contour lines can look harsh. Take extra time to blend the edges for a seamless finish.
- Skipping Seting Powder: Cream contours can move or fade without a setting powder. A light dusting of translucent powder ensures longevity.
- Ignoring the Jawline: A defined jawline is a key part of contouring. Blend your contour along the jawline and down the neck for a cohesive look.
Contouring Stick vs. Powder Contour: Which Is Right for You?
Both cream and powder contours have their place in a makeup kit. Here's a quick comparison to help you decide:
- Contouring Stick (Cream): Ideal for dry or mature skin, provides a dewy, skin-like finish, and is easier to blend. Great for creating a natural, everyday look.
- Powder Contour: Best for oily skin, offers a matte finish, and is buildable. Provides more precision and is great for dramatic, long-lasting sculpting.
Many makeup artists recommend using a contouring stick for the initial placement and blending, then setting it with a powder contour for added longevity. This technique gives you the best of both worlds.
Top Contouring Sticks to Try
Ready to find your perfect match? Below are some of the best contouring sticks on the market, selected for their quality, blendability, and shade range.
For more makeup essentials, explore our guides on foundation, concealer brushes, and powder foundation.
Best Contouring Sticks for Every Skin Tone
⚠️ AFFILIATE DISCLOSURE: This website contains affiliate links. As an Amazon Associate, we earn from qualifying purchases. If you make a purchase through these links, we may receive a small commission at no additional cost to you. Read our full affiliate policy.

wet n wild MegaGlo Dual-Ended Contour Stick, Light Medium, Cruelty-Free
Check price on Amazon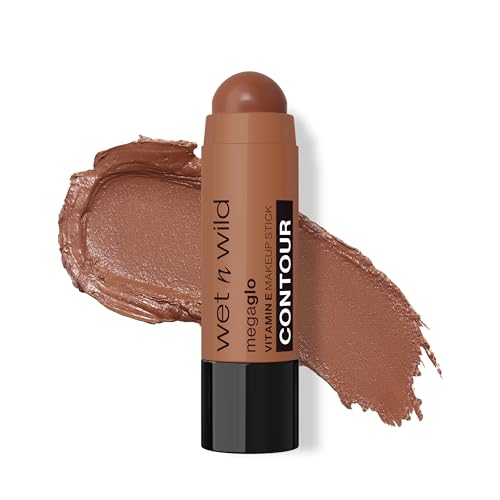
wet n wild MegaGlo Makeup Stick, Buildable Color, Versatile Use, Cruelty-Free & Vegan - Where's Walnut?
Check price on Amazon
NYX PROFESSIONAL MAKEUP Wonder Stick, Face Shaping & Contouring Stick - Universal Light
Check price on Amazon
wet n wild MegaGlo Makeup Stick Conceal and Contour Brown Oak's On You, 1.1 Ounce (Pack of 1), 804a
Check price on Amazon
3 Pcs NEUTRAL Contour Stick Set,Professional Makeup Kit for All Skin | FALOCUTUS Cream Blush & Highlighter Bronzer Pen,Long Lasting & Smooth Natural Face Contouring Illuminator
Check price on Amazon
NYX PROFESSIONAL MAKEUP Wonder Stick, Face Shaping & Contouring Stick - Fair
Check price on Amazon
ColourPop Cream Bronzer Stick - Blendable Cream Contour & Glowy Summer Makeup with a Natural, Matte Finish - Buildable Formula for Shimmer-Free, Sun-Kissed Warmth - Laguna Beach (0.28 oz)
Check price on Amazon
wet n wild MegaGlo Dual-Ended Contour Stick Medium/Tan, Cruelty-Free
Check price on AmazonAdvanced Contouring Techniques
Once you've mastered the basics, experiment with these advanced techniques to elevate your look:
- Nose Contouring: Use a thin, precise contour stick to draw lines on the sides of your nose. Blend inward for a straighter, more defined nose.
- Temple Contouring: Apply contour to your temples and blend toward your hairline to create a lifting effect.
- Collarbone Contouring: For a glamorous look, apply a subtle contour to your collarbones to make them stand out.
- Eye Contouring: Use a lighter touch to contour the crease of your eyes for a deeper, more defined eye look.
Frequently Asked Questions
Q: Can I use a contouring stick on bare skin?
A: Yes, but it blends better over a moisturized base or primer. For best results, apply after your foundation or tinted moisturizer.
Q: How do I clean my contour stick?
A: Wipe the tip with a tissue or alcohol wipe after each use to prevent bacteria buildup. You can also spritz the surface with a makeup sanitizer.
Q: Can I use a contouring stick as a bronzer?
A: While both are used to add dimension, bronzer adds warmth, while contour adds shadow. For a one-and-done product, choose a bronzer stick. For sculpting, choose a contour stick.
Q: How long does a contouring stick last?
A: Most contour sticks last for 12-18 months. The creamy formula is more prone to bacteria than powders, so it's best to replace it regularly.
For more beauty tips, visit our getting started guide or explore our beauty products page.
Final Thoughts
A contouring stick is a makeup bag essential that can transform your everyday look. With the right shade, technique, and a little practice, you can achieve a naturally sculpted appearance that enhances your best features. Whether you're heading to work, a special event, or just want to feel a little more polished, the contouring stick is your secret weapon.
Remember, beauty is all about feeling confident in your own skin. Use these tips as a starting point, and don't be afraid to experiment to find what works best for you. Happy contouring!
Disclaimer
BeautyTipsGuide provides educational content only. Not a substitute for professional medical advice. Always patch-test new products and consult a dermatologist for skin concerns. Some content may use AI. We are not responsible for adverse reactions. By using this site, you accept these terms. If you do not agree, please leave this website and discontinue its use. Read full disclaimer.