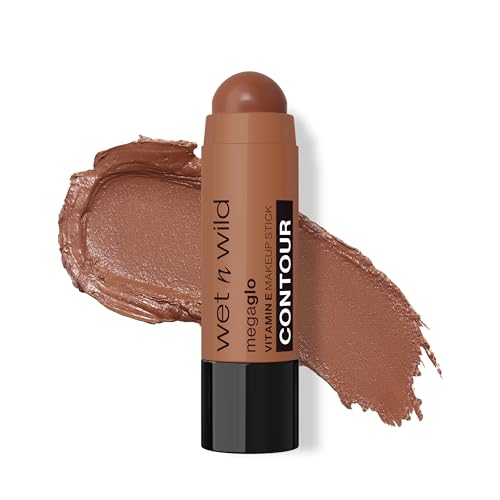
Contour Makeup for Round Face: Sculpt & Define
Discover expert contouring techniques designed specifically for round face shapes. Learn how to create dimension, add definition, and enhance your natural features with our comprehensive step-by-step guide.
START LEARNINGWhy Contour for a Round Face? A round face shape is characterized by soft angles and full cheeks. Contouring helps create the illusion of structure by strategically placing shadows and highlights to define the cheekbones, jawline, and forehead. With the right technique, you can enhance your natural beauty and achieve a beautifully sculpted look.
Understanding Your Round Face Shape
Before diving into contouring, it's essential to understand what makes a face "round." A round face typically has a similar width and length, with soft, curved features and full cheeks. The goal of contouring is not to change your face shape but to add dimension and create subtle angles that flatter your natural features.
When contouring a round face, the focus should be on creating shadows along the perimeter of the face and highlighting the center. This technique draws attention to the center of your face while minimizing the appearance of width. For those exploring different makeup styles, our guide on blusher in pink tones can complement your contour look beautifully.
It's also important to choose the right tools for the job. A quality makeup brush set is essential for precise contour application. The right brushes ensure smooth blending and a natural finish.
Step-by-Step Contour Guide for Round Faces
Follow these expert steps to create a beautifully sculpted look that enhances your round face shape:
Prep and Prime
Start with a clean, moisturized face. Apply a foundation that matches your skin tone. This creates a smooth canvas for contouring. Use a face primer to ensure your makeup lasts all day and blends seamlessly.
Map Your Face
Using a contour shade two to three shades darker than your skin, create shadows along the temples, under the cheekbones, and along the jawline. For a round face, focus on creating a diagonal line from the top of your ear toward the corner of your mouth to define the cheekbones.
Blend Thoroughly
Blend the contour using a beauty blender or a dense brush. Use circular motions to soften harsh lines and create a natural gradient. Make sure there are no visible edges—blending is key to a flawless look.
Highlight
Apply a highlighter to the high points of your face: the center of your forehead, the bridge of your nose, the tops of your cheekbones, and the chin. This draws light to the center of your face and creates dimension.
Set and Finish
Lightly set your makeup with a setting powder to lock everything in place. Finish with a setting spray for a long-lasting, natural finish.
Add Blush
To add warmth and radiance, apply a soft blush to the apples of your cheeks, blending upward toward your cheekbones. This enhances the contour and adds a healthy glow.
Choosing the Right Contour Products
Selecting the right products is crucial for a successful contour. Here's what to look for based on your needs and preferences:
Entry-Level / Budget-Friendly Options
If you're new to contouring, start with entry-level products. These are typically cream-based contour sticks or affordable powder palettes that are easy to work with. Look for products that offer buildable coverage and are easy to blend. A great option is a color corrector that can double as a contour for beginners.
Mid-Range / Mid-Tier Options
Mid-range contour products often offer better pigmentation and blendability. These include cream contour kits with multiple shades and high-quality powder bronzers. These products typically provide a more natural finish and last longer throughout the day.
Premium / High-End Options
Premium contour products are formulated with higher-quality ingredients and offer superior blendability and longevity. These include luxury cream contours and finely milled powder bronzers that create a seamless, airbrushed finish. These products are ideal for those who contour regularly and want professional-level results.
Contour Product Comparison
Here's a quick comparison of contour product types to help you choose the right one for your round face:
| Product Type | Best For | Finish | Skill Level |
|---|---|---|---|
| Cream Contour | Dry to Normal Skin | Dewy, Natural | Beginner to Intermediate |
| Powder Contour | Oily to Combination Skin | Matte, Sculpted | Beginner to Advanced |
| Contour Stick | All Skin Types | Buildable | Beginner |
| Liquid Contour | Mature Skin | Sheer, Luminous | Intermediate to Advanced |
| Contour Palette | All Skin Types | Customizable | Intermediate to Advanced |
Pro Tips for Contouring a Round Face
Elevate your contour game with these expert tips:
- Always choose a contour shade that is two to three shades darker than your natural skin tone for a natural-looking shadow.
- Use a makeup brush with angled bristles for precise contour placement along the cheekbones and jawline.
- Blend, blend, blend! Use a damp beauty blender to seamlessly blend cream contour into the skin.
- For a more defined look, use a bronzer to add warmth to the perimeter of your face before applying contour.
- Don't forget to contour your nose and forehead to create a cohesive, balanced look.
- Set your contour with a translucent powder to prevent smudging and ensure longevity.
- Use a highlighting powder on the high points of your face to enhance the contour effect.
Common Contouring Mistakes to Avoid
Avoid these common pitfalls to ensure a flawless, natural-looking contour:
- Using a contour shade that is too dark or too warm for your skin tone—this can look unnatural and muddy.
- Applying contour to the wrong areas—for round faces, focus on the perimeter rather than the center.
- Not blending properly—harsh lines can make your makeup look cakey and artificial.
- Over-contouring—start with a light hand and build up gradually for a more natural effect.
- Using the wrong tools—a quality brush set makes all the difference in achieving a seamless blend.
Frequently Asked Questions
For a round face, the best contour placement is along the temples, under the cheekbones (in a diagonal line toward the mouth), and along the jawline. This creates shadows that add structure and definition. Avoid contouring the center of the face, as this can make it appear wider.
Both cream and powder contour work well for round faces. Cream contour is ideal for dry or mature skin and provides a dewy, natural finish. Powder contour is better for oily skin and offers a more matte, sculpted look. You can also layer both for a long-lasting effect.
Choose a contour shade that is two to three shades darker than your natural skin tone. The undertone should be cool or neutral, not warm. Warm-toned contour shades can look like bronzer and may not create the desired shadow effect. Test the shade on your jawline in natural light to ensure it complements your skin tone.
Yes! A minimalist approach to contouring can be very effective. You can use a single contour stick and a beauty blender to create a subtle, natural-looking contour. Focus on the cheekbones and jawline, and blend well. For a more polished look, add a touch of highlighter to the high points of your face.
To make your contour last all day, start with a face primer to create a smooth base. Use a cream contour and set it with a matching powder contour. Finish with a setting spray to lock everything in place. Avoid touching your face throughout the day to prevent smudging.
Final Thoughts
Contouring a round face is all about creating dimension and enhancing your natural features. With the right products, tools, and techniques, you can achieve a beautifully sculpted look that flatters your face shape. Remember to blend thoroughly, choose the right shades, and practice regularly to perfect your technique.
Whether you're a beginner or a makeup enthusiast, our beauty tools section has everything you need to elevate your makeup routine. For more expert tips, explore our comprehensive makeup guides and discover the best products for your needs.