Eyelash Curler Guide: How to Curl Lashes Perfectly
Unlock the secret to wide-awake, beautiful eyes. Learn how to choose, use, and maintain the perfect eyelash curler for a stunning, long-lasting curl.
Why an Eyelash Curler? An eyelash curler is a beauty game-changer. It instantly opens up your eyes, making them appear larger and more alert. When used correctly, it's the foundation for any eye makeup look, enhancing the effect of your mascara and making your lashes the star of your makeup.
An eyelash curler is a small but mighty tool that can transform your eye makeup. It's a simple device designed to curl your lashes upwards, instantly making your eyes look bigger, brighter, and more open. Whether you have short, straight lashes or long, stubborn ones, a quality curler is an essential part of any makeup kit. This guide will walk you through everything you need to know about this essential beauty tool, from choosing the right one to mastering the perfect technique.
What is an Eyelash Curler?
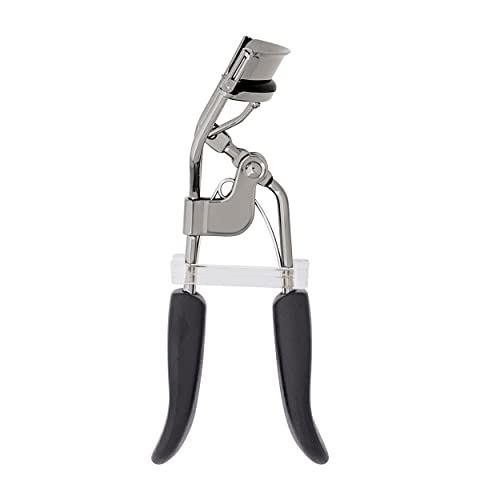
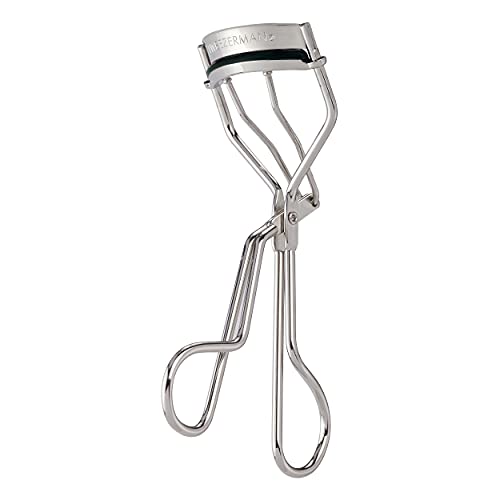
An eyelash curler is a handheld beauty tool used to curl your natural eyelashes. It typically consists of a clamp-like mechanism with a padded bar. When you close the clamp over your lashes, the pad presses against them, gently bending them upward into a curl. This simple action creates the illusion of longer, fuller lashes and a more awake appearance. While it is one of the simplest makeup artist tools, the impact it has on your final look is truly remarkable.
Why You Need an Eyelash Curler
Many people underestimate the power of a good eyelash curler. Here’s why it should be a staple in your makeup routine. First, it opens up your eyes, making them look larger and more awake, which is especially beneficial if you have hooded or down-turned eyes. Second, a curled lash holds mascara better and prevents it from smudging onto your eyelid. Third, it enhances the effect of volumizing and lengthening mascaras, giving you a more dramatic, wide-eyed look. In essence, it’s a non-invasive, instant pick-me-up for your eyes.
How to Choose the Right Eyelash Curler
Choosing the right eyelash curler can feel overwhelming, but focusing on a few key aspects will make the decision easier. Not all curlers are created equal; the shape and size need to fit the natural curve of your eye. Here are the main factors to consider:
- Eye Shape: For round eyes, a curler with a more dramatic curve works best. For almond or hooded eyes, a flatter, wider curler is often more comfortable and effective.
- Pad Quality: The rubber pad is crucial. Look for a curler with soft, but firm, silicone or rubber pads. They should be replaceable, as they wear out over time and can become sticky or hard.
- Build Quality: A well-constructed curler feels solid and smooth. Stainless steel or high-quality metal curlers last longer and apply even pressure. Avoid flimsy plastic curlers, as they may not provide a consistent curl.
- Curler Type: While traditional clamping curlers are most common, you can also find heated curlers that work similarly to curling irons. For beginners, a standard clamp curler is the best place to start.
To help you decide, we've included a selection of recommended eye curlers in the products section below.
How to Use an Eyelash Curler (Step-by-Step Guide)
Mastering the technique is key to getting a perfect curl without pinching or damaging your lashes. Follow these simple steps for the best results.
- Start with Clean, Dry Lashes: Mascara or any moisture can cause lashes to stick to the pad and be pulled out. Ensure your lashes are completely clean and dry.
- Open Your Eye Wide: Look slightly downward into a mirror to easily access the root of your lashes. This also helps to see what you’re doing.
- Clamp at the Base: Position the curler as close to the base of your upper lashes as possible, without pinching your eyelid. This is the most important step for a long-lasting curl.
- Apply Gentle Pressure: Squeeze the handles firmly and hold for about 5-10 seconds. Avoid pulling or tugging, as this can damage your lashes.
- Repeat in Sections (Optional): For an even more intense curl, release the clamp and move it slightly outward (towards the tips of your lashes) and clamp again for a few seconds. This creates a natural, lifted curl.
- Apply Mascara (Optional): Once you've achieved the desired curl, immediately apply your favorite volume lashes mascara to lock in the curl.
Pro Tip: For a curl that holds all day, warm up the curler with a hairdryer for a few seconds (on a low heat setting) before clamping. Always test the temperature on your hand before using it near your eyes.
Types of Eyelash Curlers
While the traditional clamp-style curler is the most popular, there are a few other types that cater to different needs and preferences.
- Traditional Clamp Curler: This is the most common type and is available in various sizes and shapes. It's reliable, affordable, and great for everyday use.
- Heated Eyelash Curler: These look like tiny curling irons and use heat to curl lashes. They can be more effective for stubborn, straight lashes but require more caution to avoid burns.
- Mini/Travel Curler: Smaller in size, these are perfect for your makeup bag and great for touch-ups or curling individual lashes.
- Curling Wand: A newer innovation, this looks like a mascara wand but is designed to curl and lift lashes. They are often more gentle and less intimidating for beginners.
Pros and Cons of Using an Eyelash Curler
Pros
- Immediately opens up and brightens the eyes
- Helps mascara perform better and last longer
- Creates a more awake, youthful appearance
- Affordable and easy to use with practice
- A portable, non-invasive beauty tool
Cons
- Can pinch or pull out lashes if used incorrectly
- Can be tricky to learn for some eye shapes
- Rubber pads need to be replaced frequently
- Can be uncomfortable for people with sensitive eyes
How to Maintain Your Eyelash Curler
To ensure your eyelash curler works effectively and safely, regular maintenance is essential.
- Clean it Regularly: Wipe the metal parts and the rubber pad with a gentle makeup remover or isopropyl alcohol to remove any residue, mascara, or bacteria.
- Replace the Pad: The rubber pad should be replaced every 3-6 months, depending on use. A worn-out pad can become sticky and damage your lashes. Most curlers come with one or two replacement pads.
- Check for Rust: If your curler is made of metal, ensure it doesn’t rust. Rust can be harmful to your eyes, so replace the curler if you see any signs of corrosion.
- Store Properly: Keep your curler in a cool, dry place, away from moisture to prolong its life.
Common Mistakes to Avoid with Your Eyelash Curler
Even the best eye curler guide can't help if you're making these common mistakes. Avoid them for perfect lashes every time.
- Curling After Applying Mascara: This is a big no-no. Mascara makes lashes sticky and brittle, which can cause them to break or get ripped out when clamped.
- Not Using a Clean Curler: A dirty curler can harbor bacteria, leading to eye infections, and old mascara residue can make the pad sticky, causing damage.
- Using Too Much Force: Squeezing the curler too hard or holding it for too long can create a harsh, unnatural 90-degree angle in your lashes instead of a gentle curl.
- Skipping the Root: Only curling the middle or tips of your lashes will not give you the eye-opening effect you're looking for. Always start at the base.
Ready to Find Your Perfect Eyelash Curler?
Explore our curated selection of the best eyelash curlers below. We've chosen a range of options to suit different budgets and eye shapes, ensuring you'll find the perfect tool for your beauty routine.
Shop Eyelash Curlers