Brow Tint: The Ultimate Guide to Perfect Brows
Everything you need to know about brow tinting — from what it is and how it works, to step-by-step application tips and the best products on the market.
Shop Best Brow Tint Products💁♀️ What Is Brow Tint?
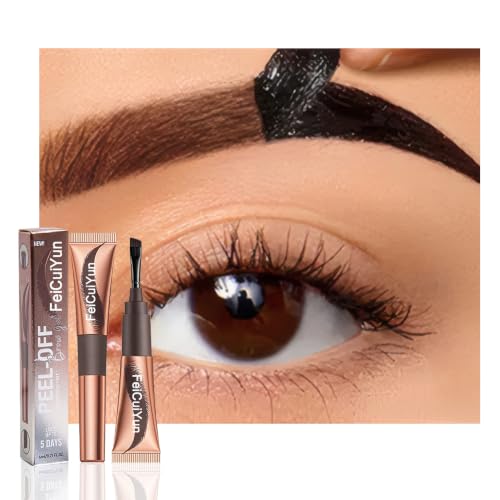
Brow tint is a semi-permanent dye used to enhance the color, shape, and fullness of your eyebrows. Whether you have naturally light brows, sparse patches, or just want a more defined look, brow tinting can give you that polished, put-together appearance without the daily hassle of filling them in with pencils or powders.
Unlike permanent makeup or microblading, brow tint is a non-invasive treatment that typically lasts between 2 to 6 weeks, depending on your skin type, aftercare, and the product used. It's a favorite among beauty enthusiasts for its ability to create natural-looking, fuller brows that frame the face beautifully.
✨ Benefits of Brow Tint
- Saves time: No more daily brow makeup — wake up with ready-to-go brows.
- Natural-looking results: Tints enhance your natural brow color without looking harsh.
- Defines and shapes: Tinting can create the illusion of thicker, fuller brows.
- Cost-effective: A professional tint is affordable, and at-home kits are even more budget-friendly.
- Customizable: Choose from a range of shades to match or complement your hair color.
🧪 How Brow Tint Works
Brow tinting uses a gentle, semi-permanent dye formulated specifically for the delicate eye area. The dye penetrates the outer layer of the hair and stains the skin beneath the brow for a fuller effect.
The process is simple: a cream or gel-based tint is applied to clean, dry brows and left to develop for a few minutes. The tint is then wiped off, revealing darker, more defined eyebrows. The results are immediate, and the entire process takes less than 15 minutes.
🏠 At-Home vs. Professional Brow Tint
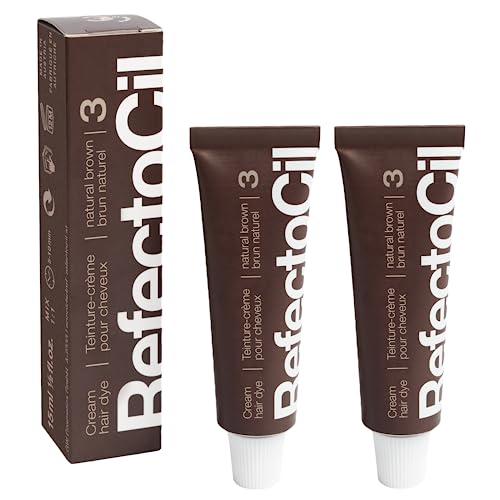
At-home brow tint kits are a great option for those who prefer DIY beauty. They're affordable, convenient, and many brands now offer easy-to-use kits with clear instructions. Professional brow tinting at a salon or brow bar offers expert color matching, precise application, and customized results. A professional can also help you choose the right shade for your skin tone and hair color.
If you're new to brow tinting, consider starting with a professional service to see how it suits you. Once you're comfortable, you can switch to at-home kits for maintenance. Regardless of your choice, always patch-test before applying any tint to avoid allergic reactions.
📋 Step-by-Step Guide to Brow Tinting
Follow these simple steps for flawless tinted brows — whether you're doing it yourself or preparing for a salon visit.
- Cleanse your brows: Remove all makeup, oils, and dirt from your eyebrows and the surrounding skin. This ensures the tint adheres evenly.
- Apply petroleum jelly: Dab a small amount around your brows (not on the hair) to protect your skin from staining.
- Mix the tint: Follow the instructions on your kit to mix the dye and developer to the right consistency.
- Apply the tint: Using the applicator brush, apply the tint to your brows, starting from the inner to the outer corner. Cover all hairs evenly.
- Wait and watch: Let the tint develop for the recommended time (usually 5-10 minutes). Check periodically to see how the color is developing.
- Remove gently: Use a damp cotton pad to wipe off the tint. Rinse with water and pat dry.
- Shape and style: Brush your brows into place and admire your new, defined look.
💡 Pro Tip
For a more defined shape, pair your brow tint with a brow lamination treatment. Tinting adds color, while lamination sets the hairs in an upward, fluffy position for a full, feathery look.
🎨 How to Choose the Right Shade
Choosing the right brow tint shade is crucial for natural-looking results. Here are some guidelines:
- For blondes: Choose a shade 1-2 tones darker than your hair color. Golden blonde or taupe works well.
- For brunettes: Match your brow tint to your hair color or go one shade darker for more definition.
- For redheads: Opt for auburn, copper, or warm brown tones that complement red hair.
- For dark hair: Use a dark brown or black-brown tint that matches your natural darkness without looking harsh.
- If you're unsure: Start with a lighter shade and build up — you can always go darker, but lightening is much harder.
🧴 Aftercare Tips for Longer-Lasting Tint
- Avoid water and steam: For the first 24 hours, keep your brows away from water, steam, and sweat to allow the tint to fully set.
- Skip heavy makeup: Avoid applying foundation or heavy concealer directly over your brows during the initial 24 hours.
- Be gentle: When cleansing your face, gently pat the brow area dry instead of rubbing.
- Use oil-free products: Oil-based makeup removers and skincare can fade your brow tint faster. Opt for water-based cleansers.
- Touch up as needed: Depending on your hair growth cycle and skincare routine, you may need a touch-up every 2 to 4 weeks.
❓ Frequently Asked Questions About Brow Tint
-
Is brow tint safe?
Yes, when done correctly. Always perform a patch test 24-48 hours before your first application to check for allergic reactions. -
How long does brow tint last?
It typically lasts 2 to 6 weeks, depending on your skin type, aftercare routine, and the specific product used. -
Can I tint my brows if I have sensitive skin?
Yes, but choose a gentle, hypoallergenic formula designed for sensitive skin. Always patch test first. -
Will brow tint stain my skin?
It may temporarily stain the skin beneath your brows, but this fades after a few days. Applying petroleum jelly around the area minimizes staining. -
Can I tint my brows if they're already dark?
Yes, you can still enhance and define them with a tint. A darker or richer shade can make sparse areas appear fuller.
Related Beauty Guides
Explore more expert beauty content: Eyebrow Shaping Guide, Brow Lamination, Powder Brows, Clear Brow Gel, Tinted Eyebrow Gel, Makeup Tutorials, Getting Started with Beauty, Minimalist Makeup Routine, Clean Beauty Makeup, K-Beauty Trends, Best Beauty Products.